Today is the day! Follow these simple steps to forever change your perspective on what this all-American staple is capable of being.
I want to take a moment to thank my original charcuterie mentor Seth Davis over at Crooked Oak Brewing Co. (IG: crookedoakbrewingco) for the friendship, tutelage and support in my quest to get on his level at the charcuterie game.
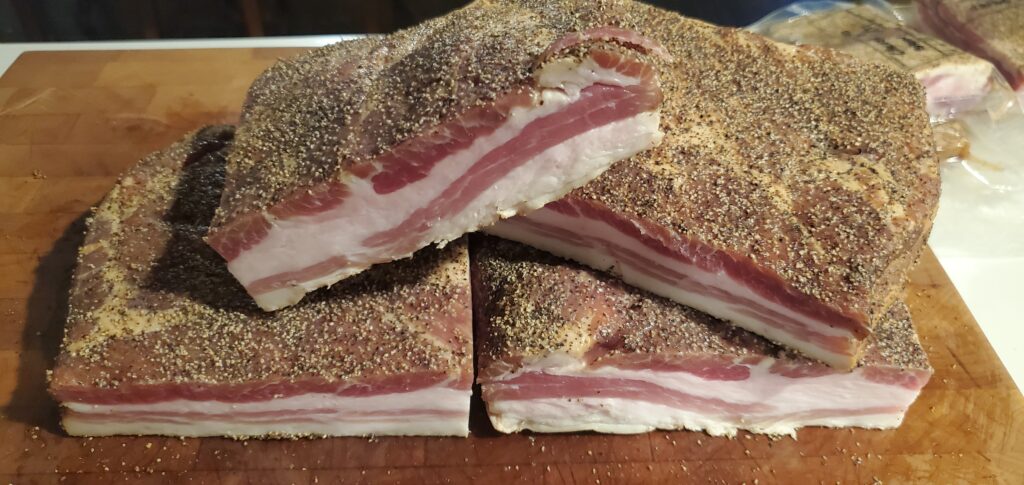
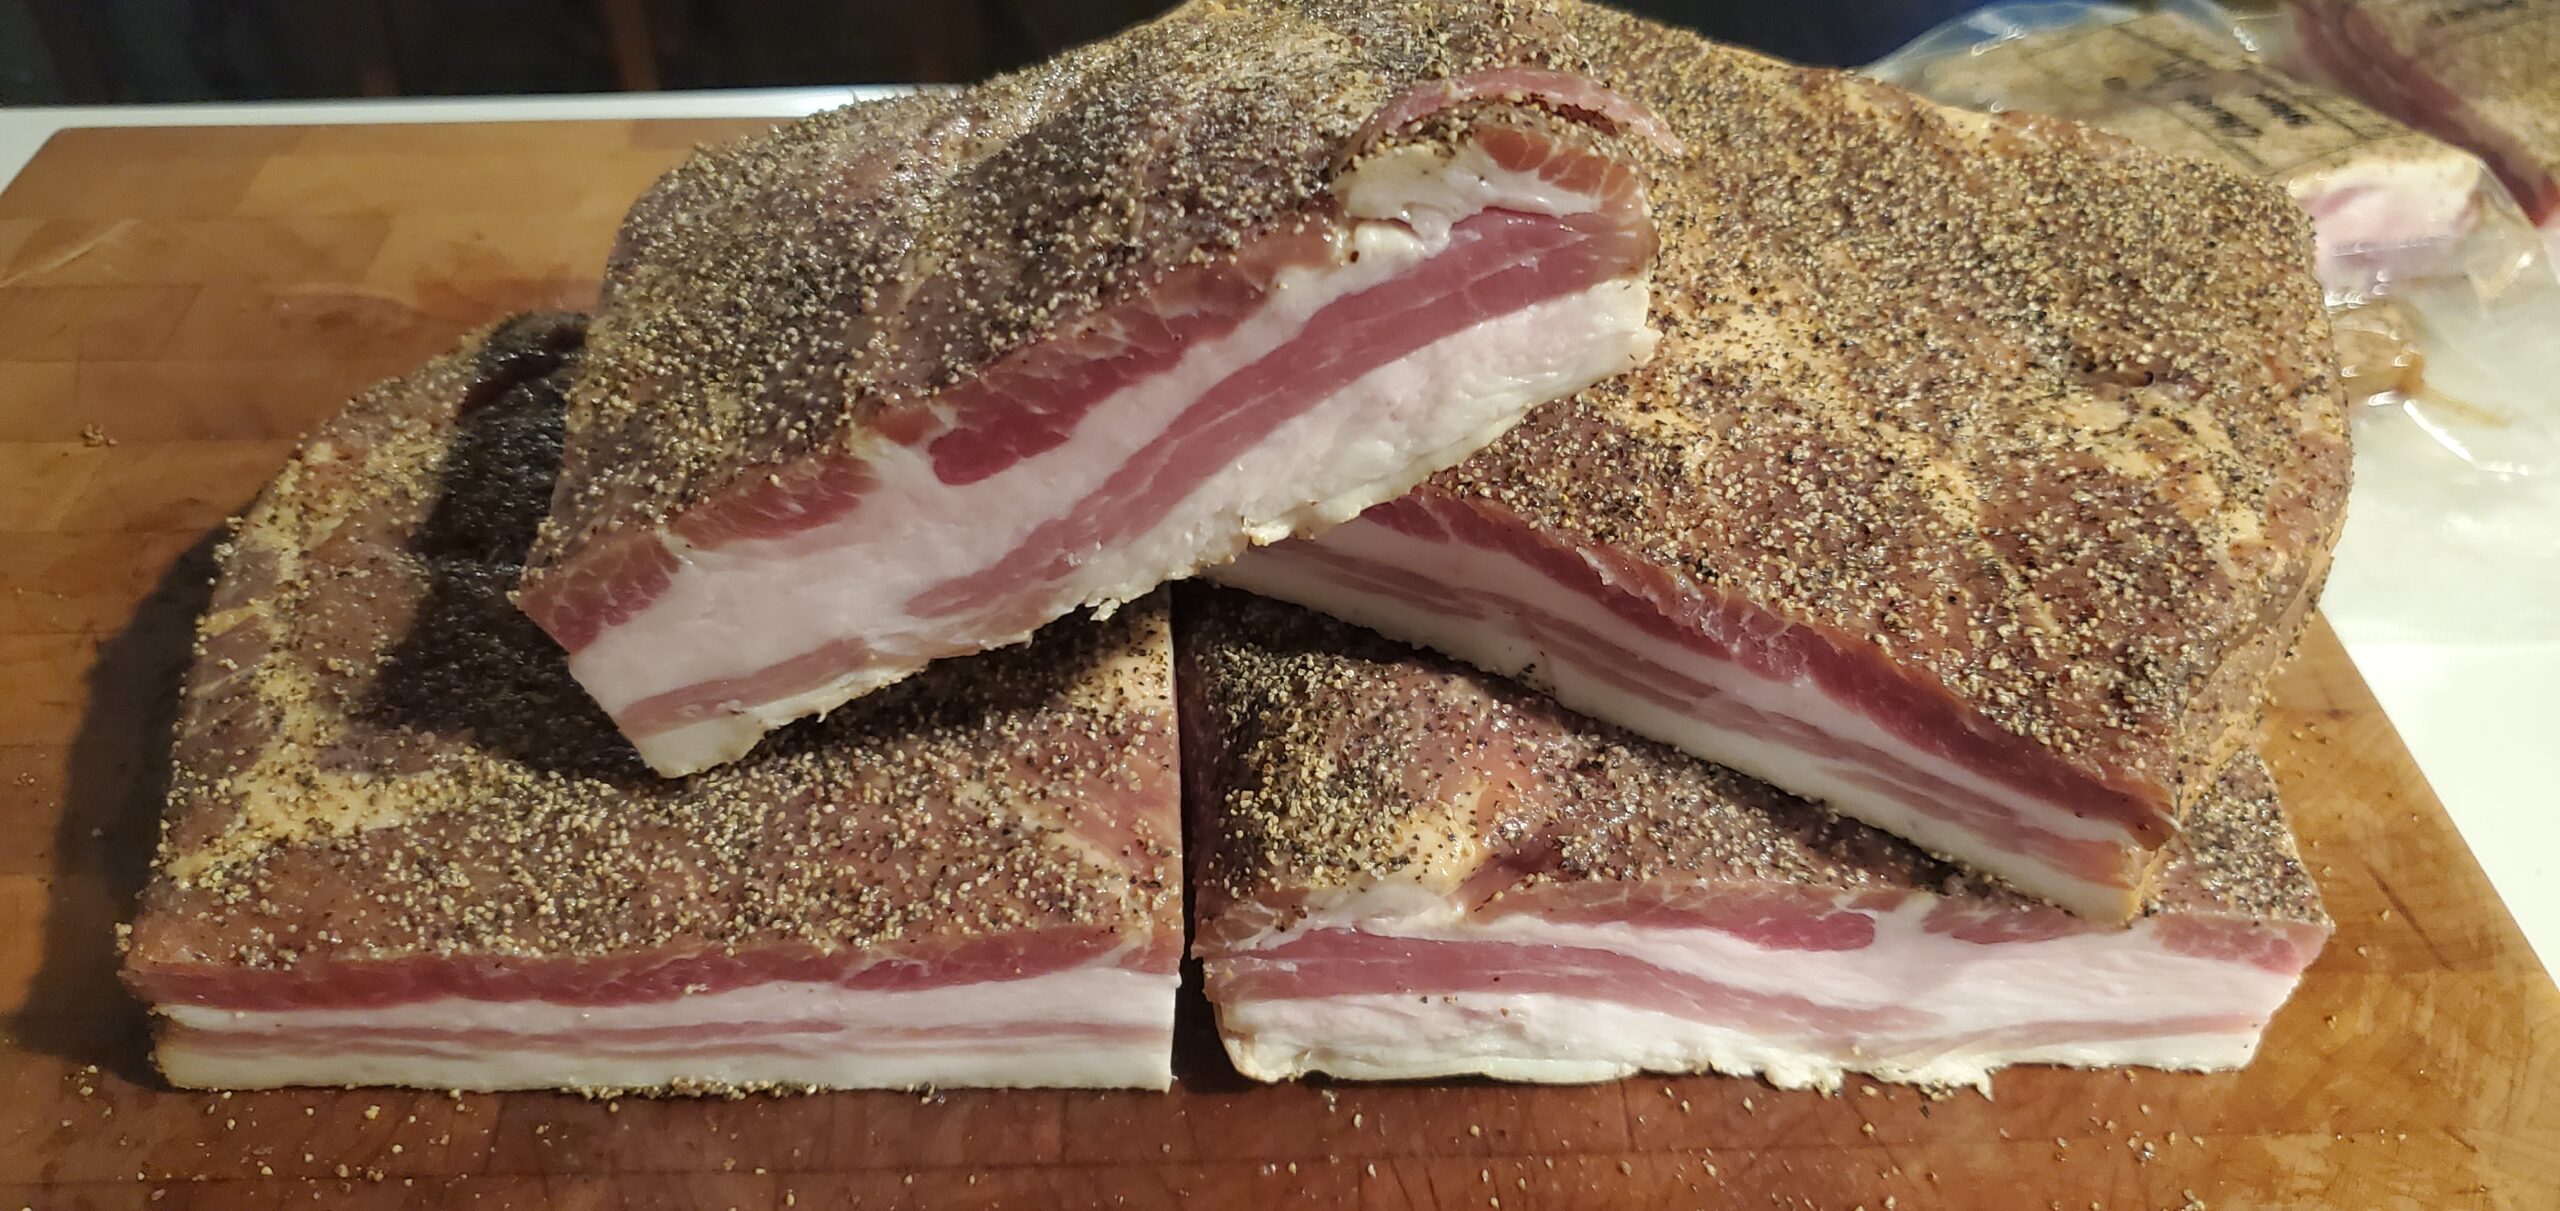
Homemade Cherry Smoked Bacon
Homemade bacon changes your life forever. Once you discover how easy it is to take ownership of the skills and means by which to produce your own bacon, you'll never look at store bacon the same again. To compare the two would be akin to comparing a Pinto to a Ferrari.Follow these simple steps to another huge milestone in your culinary liberation.
Ingredients
Equipment
Method
- Remove pork belly from packaging, and using your food scale, measure its weight in grams. Ensure you tare the scale if you're placing the belly on a plate on the scale (which you likely will be, to keep the scale clean).
- Set the belly aside, place a small bowl on the scale, and tare the scale. Then calculate 2% of the weight of the belly, and weigh out that much salt. Move the salt to a second small bowl.
- With a now empty bowl on the scale, tare the scale again, and add sugar to 1.5% of the weight of the belly, and again, move it to the second bowl.
- Now, with an empty bowl on the scale again, tare it once more, and add 0.25% curing salt. Please take special care not to botch the math (I've almost done this many times by missing a zero when doing the percentage).
- Mix the weighed ingredients together.
- Place the belly in a large ziploc bag, and add half of the weighed out mixture to each side of the belly, rubbing it in well on both sides.
- (optional) record the weight of the belly and all of the ingredients on the bag for future notes and fine tuning of the cure to your liking.

- Remove most of the air from the bag, and place in your fridge for seven days, flipping every day during that week.
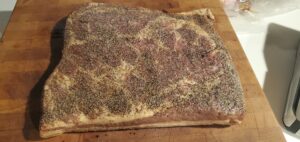
- After seven days, remove the belly, and pat it dry, and use meat hooks to hang the belly in your smoke chamber of choice.
- (optional) lightly coat the bellies with pepper. I prefer 16 mesh for bacon.
- Fill the smoke tube with cherry pellets (or any other pellets you feel like using, but cherry is the best in my opinion), and light one end so it starts smoldering like a huge cigar.
- Cold smoke for ten hours, ensuring that the temp inside your smoke chamber does not exceed 90 degrees Fahrenheit. If it gets over 90F, remove the bacon, put it up in the fridge, and start again once your ambient temps drop enough (this might have to be at night if you live in a hot climate or its summer). I often fill the water tray in my smoker with ice to help bring the temp down if I'm running too hot. After at least ten hours of smoke, you're good to remove the bacon, slice, package and enjoy. Don't be afraid to experiment with longer smoke times or different pellets to make it your own!